Technique
Knife Skills 101: The Five Cuts That Do Most of the Work
You do not need culinary school to cut like a pro. Master the pinch grip, the claw, and five basic cuts, and weeknight prep gets faster, safer, and more even.
Ask anyone in our test kitchen what made the biggest difference in their cooking, and the answer is rarely a fancy ingredient. It is a sharp knife and the confidence to use it. Good knife work makes prep faster, keeps your fingers safe, and helps food cook evenly, because pieces that are the same size finish at the same time. The good news is that you do not need culinary school. A handful of cuts, practiced for a couple of weeks, will cover almost everything a home cook does.
Start with the right setup
Before you cut anything, set up your station. A wobbly board is the number one cause of slips, so lay a damp paper towel or thin kitchen towel under your cutting board to lock it in place. Choose a board big enough to hold what you are cutting with room to push prepped food aside, ideally at least 12 by 18 inches. Wood and soft plastic boards are gentle on edges; glass, stone, and ceramic boards dull a blade quickly and should be saved for serving.
For knives, an 8-inch chef's knife handles the vast majority of jobs. Add a paring knife for small work and a serrated knife for bread and tomatoes, and you are fully equipped.
Grip and guiding hand
Most beginners hold the knife by the handle with a finger pointed along the spine. It feels steady but gives you little control. Instead, use a pinch grip: pinch the blade just in front of the handle between your thumb and the side of your bent index finger, then wrap your remaining fingers around the handle. Your hand and the knife now move as one unit.
Your other hand is the guiding hand, and it matters just as much. Curl your fingertips into a loose claw and rest them on top of the food, knuckles facing the blade. The flat of the knife can glide against your knuckles as a guide while your fingertips stay tucked safely behind. Move the claw back a little after each slice.
The five cuts that cover almost everything
1. The rough chop
For stocks, sauces that will be blended, and roasting pans where looks do not matter, a rough chop is all you need. Aim for pieces roughly the size of a large grape and do not fuss over shape. The goal is speed and fairly even sizing.
2. The dice
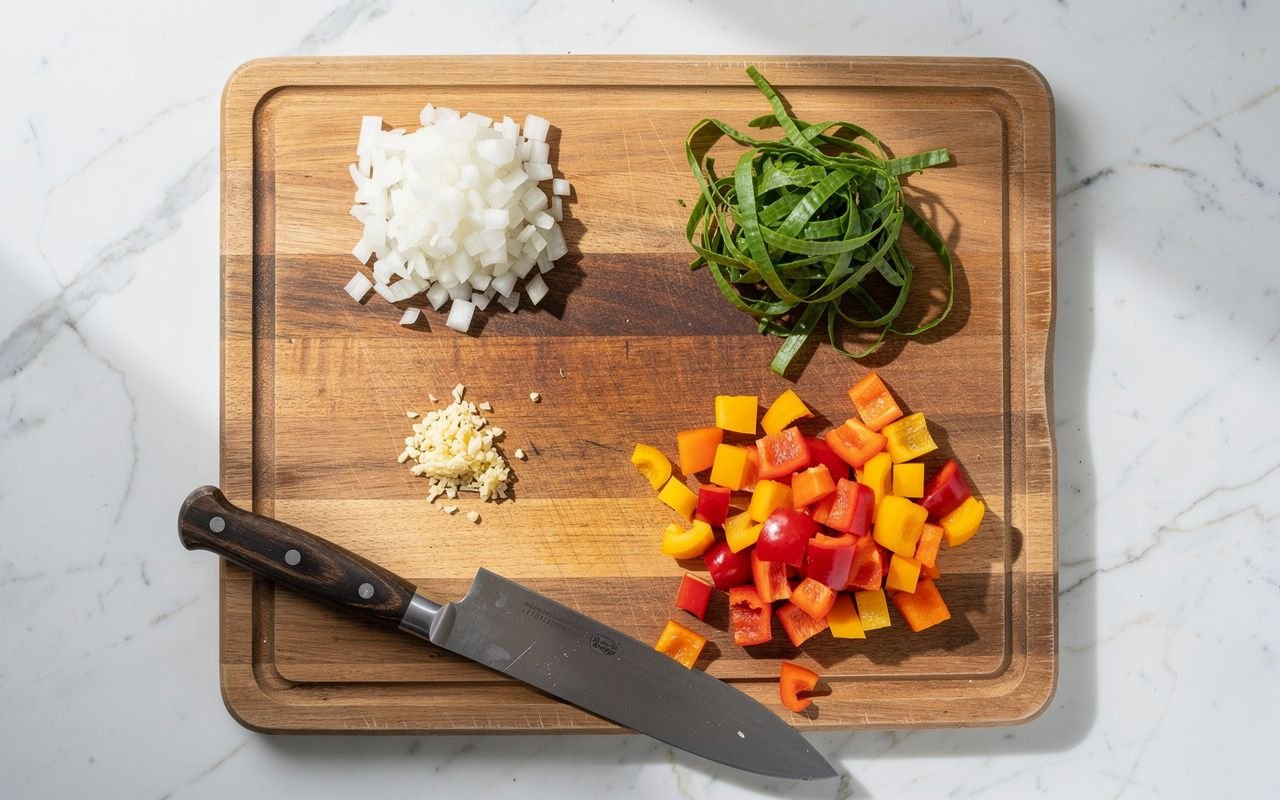
A true dice starts with a stable flat surface. Trim one side of a round vegetable so it sits flat, cut it into even planks, stack the planks and cut them into sticks, then turn the sticks and cut across into cubes. A small dice is about 1/4 inch, medium about 1/2 inch, and large about 3/4 inch. Most recipes that simply say diced mean medium.
3. The onion dice
Onions get their own method because the root end holds everything together. Halve the onion through the root, peel it, and lay it cut side down. Make vertical slices from the tip toward the root without cutting through it. Make one or two horizontal cuts parallel to the board, again stopping short of the root. Then slice across, and even dice falls away. Save the root end for stock.
4. The mince
Garlic, ginger, shallots, and fresh chiles are often minced. Slice thinly, gather the slices into a pile, and rock the knife over them, keeping the tip on the board and pivoting as you go. Scrape the pile back together with the spine of the knife, not the edge, and keep rocking until the pieces are very fine. A pinch of salt on garlic helps it break down into a smooth paste.
5. The chiffonade
For basil, mint, and leafy greens, stack several leaves, roll them tightly into a cigar, and slice across the roll into thin ribbons. Use a sharp knife and a single slicing stroke so the delicate leaves do not bruise and darken.
Slice, do not smash
A knife cuts best when it moves forward or backward as it moves down. With a chef's knife, a smooth forward-and-down motion does the work with far less force. Pressing straight down crushes tomatoes, bruises herbs, and tires your wrist. If you find yourself pushing hard, either the knife is dull or you are chopping rather than slicing.
Keep the edge sharp
A sharp knife is a safer knife because it goes where you aim it instead of skidding off a tomato skin. There are two separate jobs here:
- Honing realigns the edge and should happen often. Hold the blade at about 15 to 20 degrees against a honing rod and draw each side down the rod five or six times.
- Sharpening removes metal to create a new edge. Depending on how much you cook, that is needed every few months. A whetstone gives the best results with practice, and a good manual sharpener is a reasonable option.
Care habits that protect your knives
- Hand wash and dry right away. The dishwasher knocks edges against other items and can loosen handles.
- Store knives on a magnetic strip, in a block, or with edge guards, never loose in a drawer.
- Scrape food across the board with the spine, not the edge.
- Never leave a knife in a sink full of soapy water where someone could reach in.
A two-week practice plan
Skills stick with repetition, so build knife work into meals you already make. In week one, focus on grip and the claw while making a simple salsa or a base of onion, carrot, and celery; go slowly and aim for even pieces. In week two, add speed gradually and practice mincing garlic and slicing herbs for a finishing garnish. That is the quiet payoff of good knife skills: everything else in the kitchen gets easier.
Want every recipe mentioned in the journal? Try the club free for 15 days.